Create Amazing 3D Portfolio Dark Layout In Photoshop
Hello there everybody and welcome to another PSD web design tutorial here at 1stwebdesigner! In this tutorial you will learn how to create a 3D like design using simple gradients and other effects how to achieve great layout without any big problems. Now I will guide you through this tutorial and I am sure you will learn a few tricks as well!
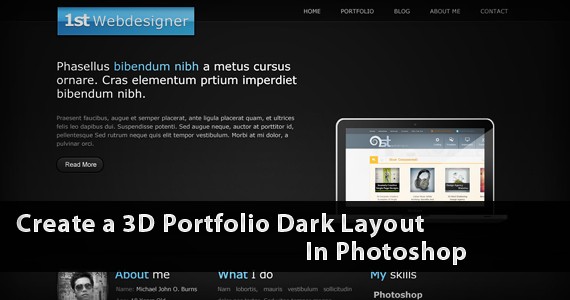
Let’s get started – I hope you will make out together with me until successful finish together !
Resources you will need to complete this tutorial:
Here is what we will making, click on image for full preview:
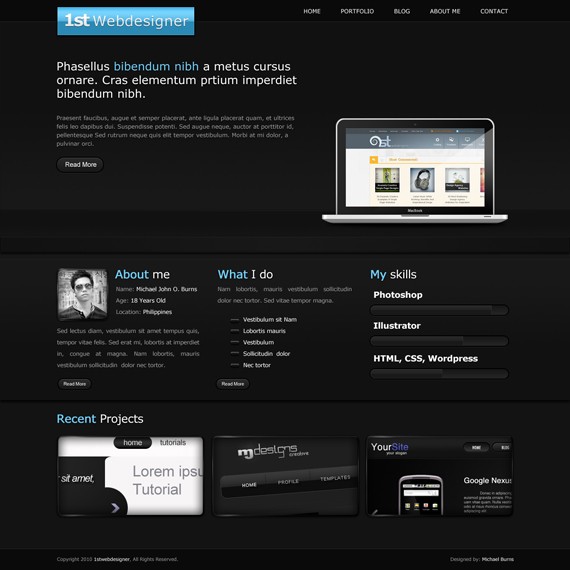
Before we get started download first 960grid system for easy Guideline creation.
Open 960_download\templates\photoshop\960_grid_12_col.psd
We also need to make sure that our Rulers and Guides are viewed. By pressing
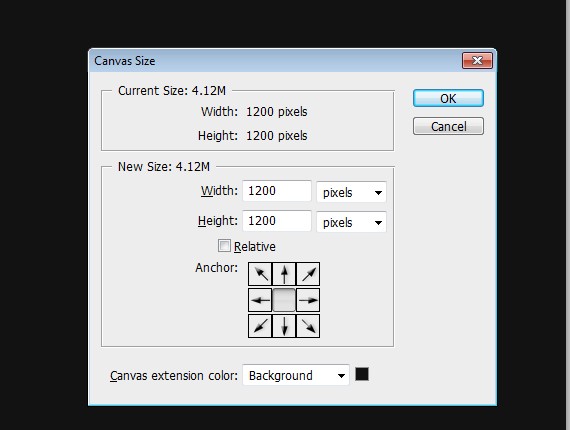
Fill the background color to #131313.
Create new guide. Click on View > New Guide
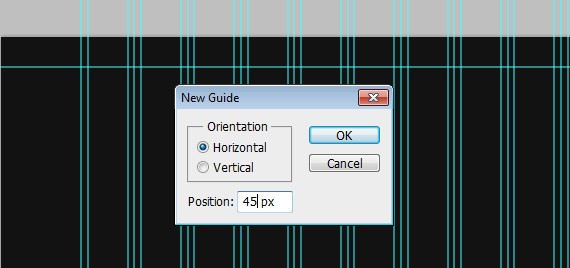
Select Rectangular Marquee Toll(M) and make a selection from the guide we made, fill it with #0a0a0a color.
Add this Blending Option:
Stroke
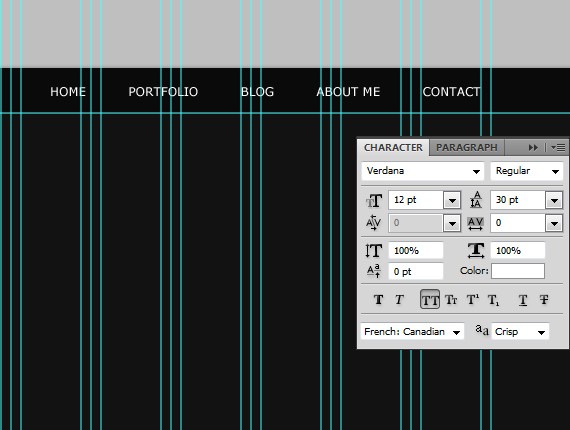
Create another folder inside the Header name it Logo, put all your logo related layers there.
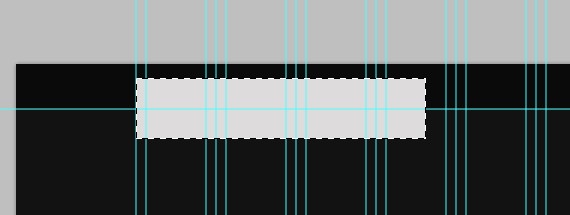
Next we will create our logo. Select Rectangular Marquee Tool(M) make a selection as shown below and fill it with any color.
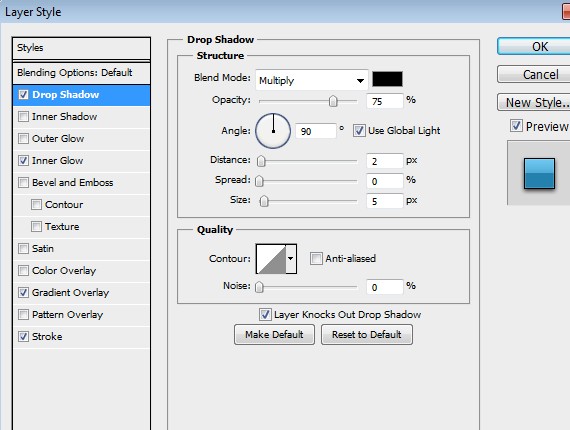
Add this Blending Option to it:
Drop Shadow
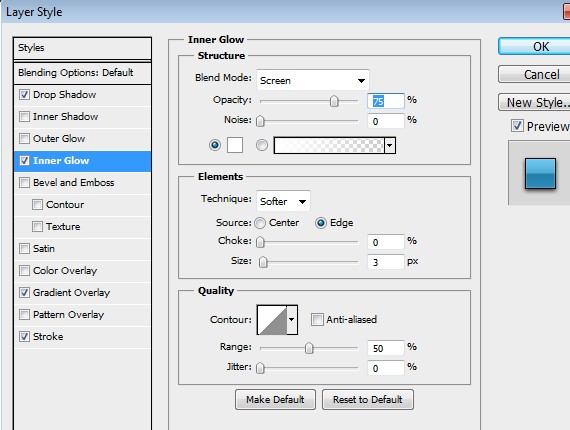
Inner Glow
Gradient Overlay
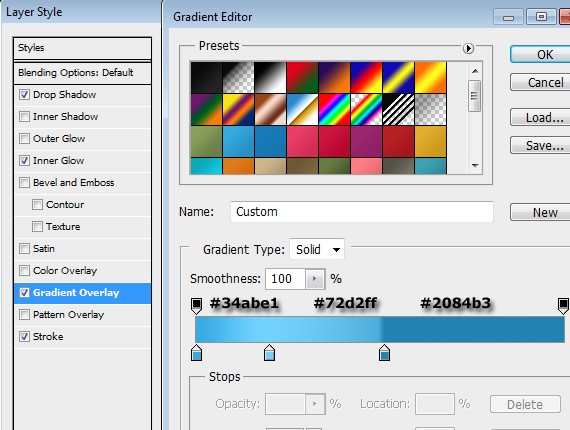
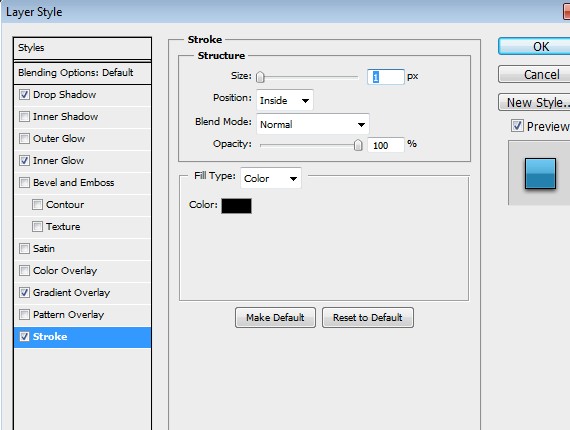
Stroke
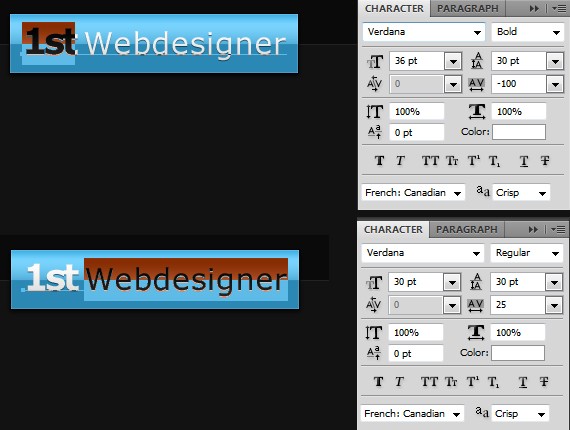
Select Text Tool(T) add up your Site Name.
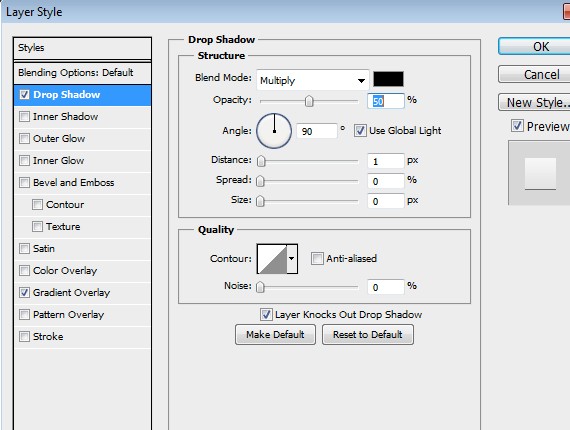
Add this Blending Option to it:
Drop Shadow
Gradient Overlay
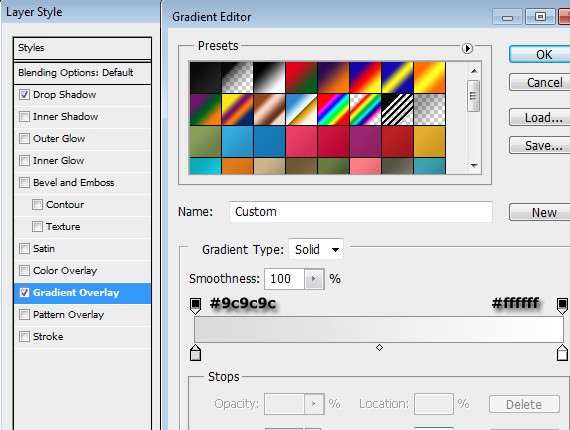
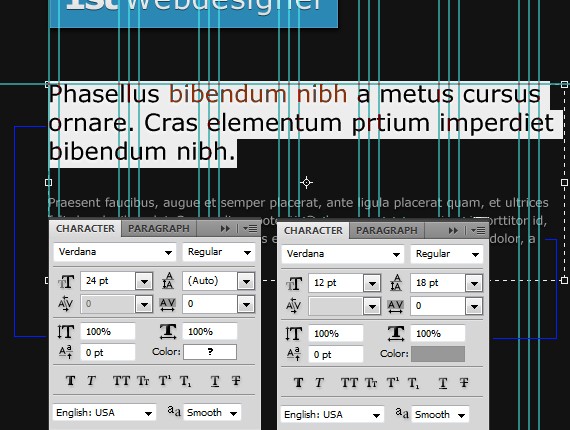
Add this Blending Option:
Drop Shadow
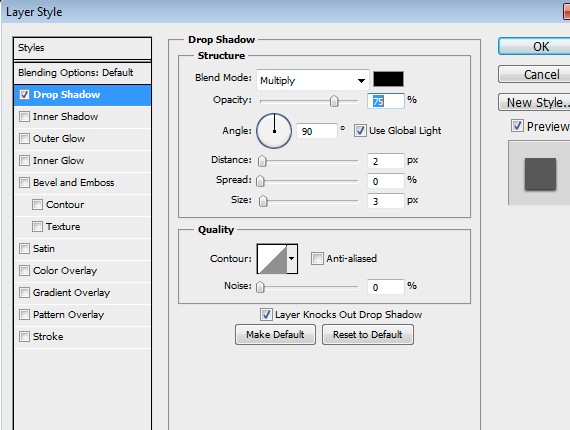
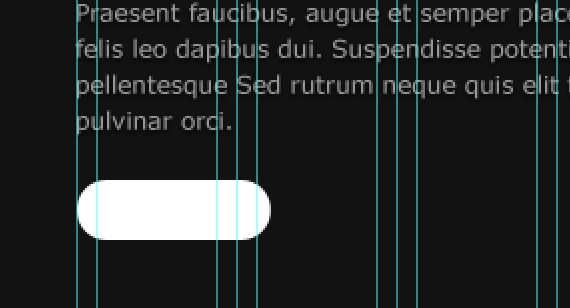
Select Rounded Rectangle Tool(U) Radius to 15px.
Add this Blending Option:
Drop Shadow
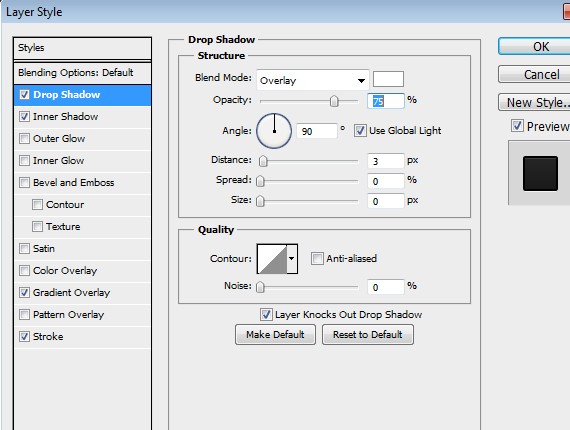
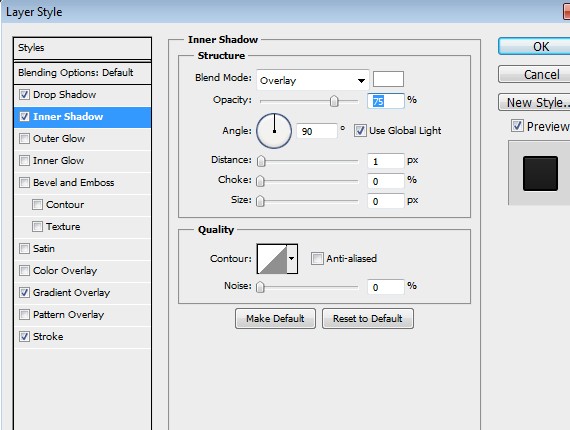
Inner Shadow
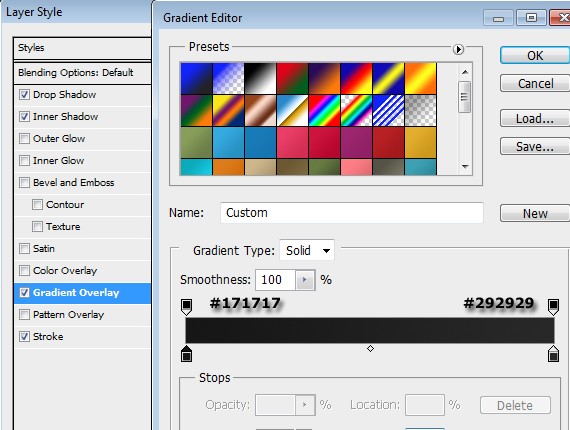
Gradient Overlay
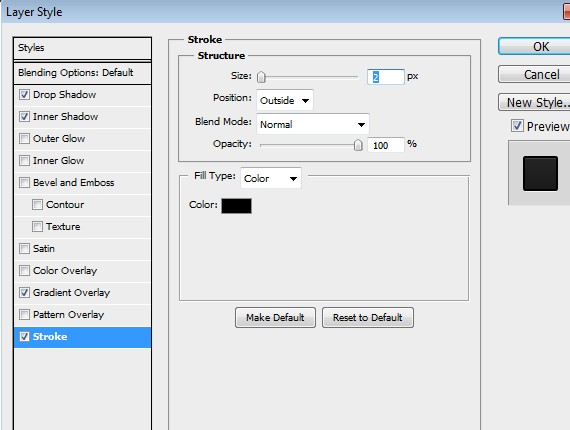
Stroke
Add Read More text size to 14pt, add a solid drop shadow 2px.
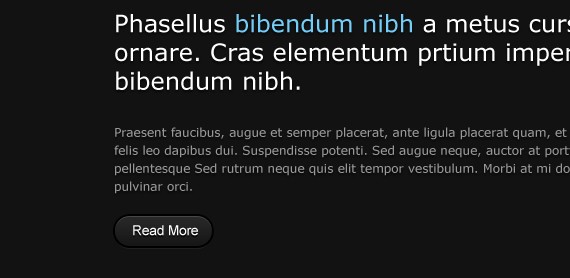
At the very bottom of welcome_displays layers add another layer name it background.
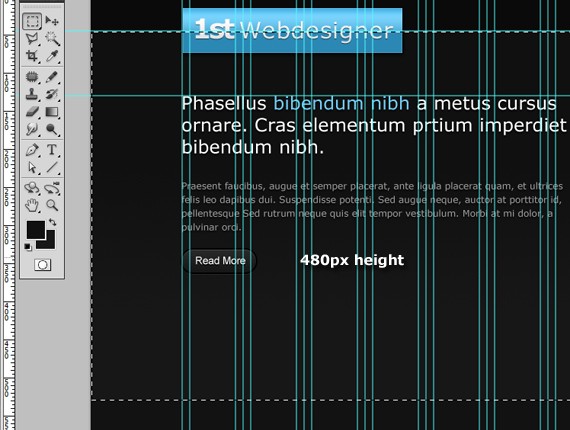
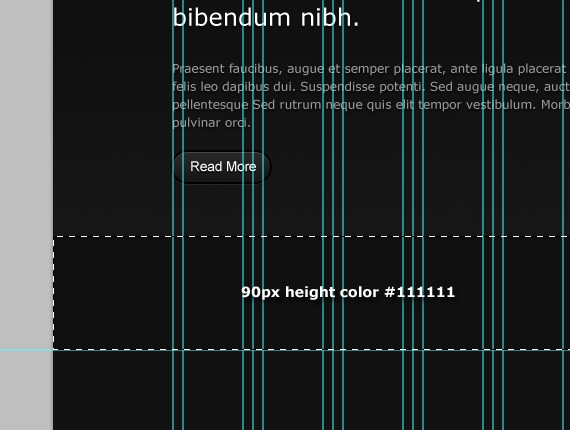
Select Gradient Tool and use linear gradient. Foreground Color #111111 background #181818.
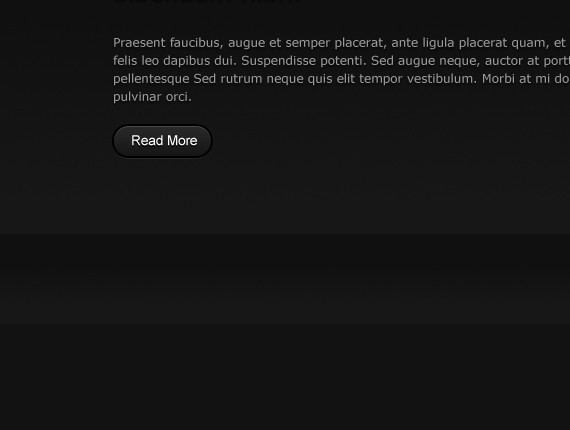
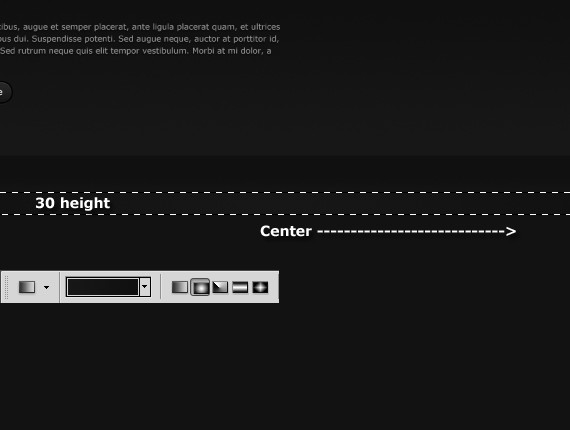
Add this Blending Option to it:
Drop Shadow
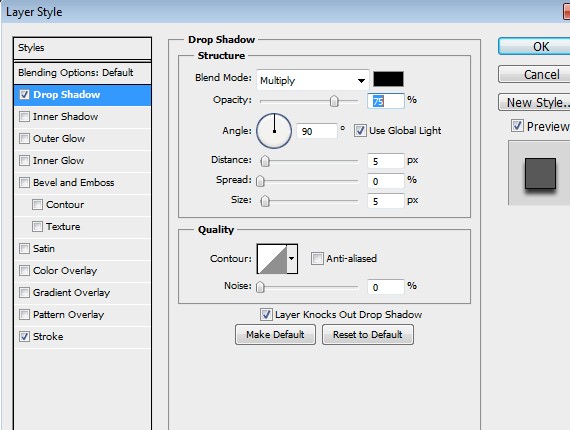
Stroke
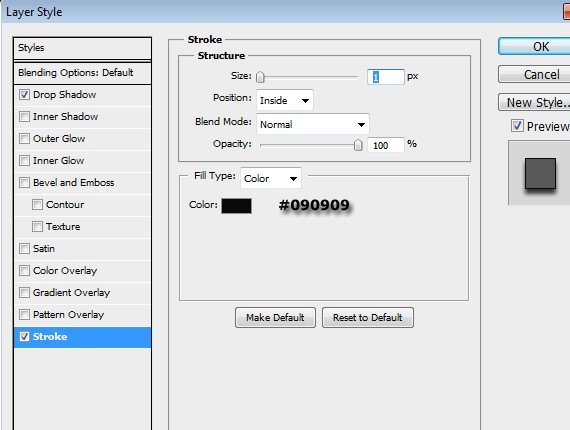
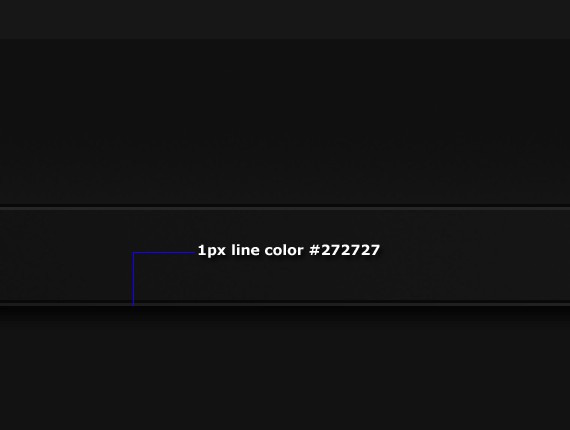
Now Create a 1px line color #272727
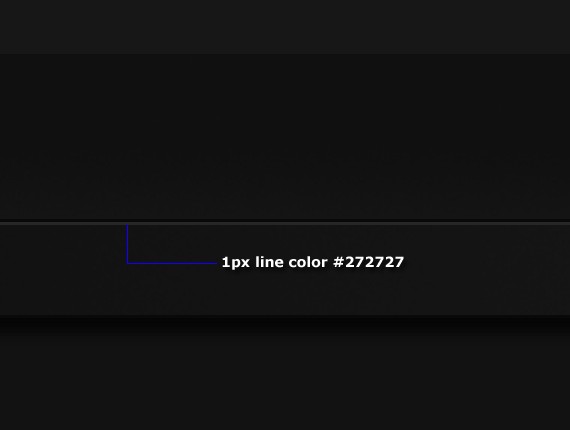
Duplicate the line and place it on the bottom:
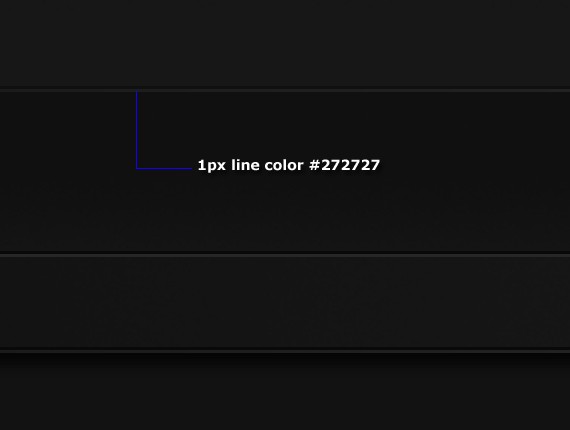
Duplicate layer again and place it to the top.
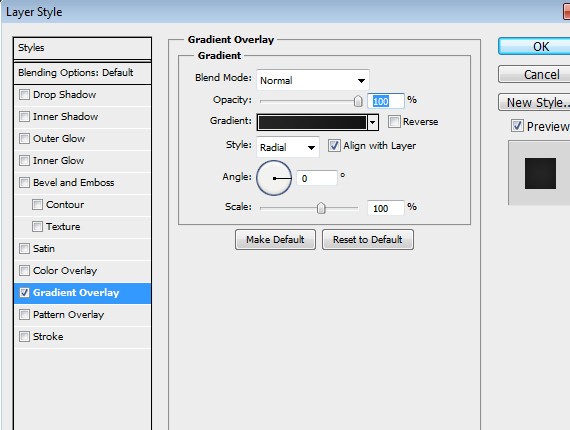
Add this Blending Option:
Gradient Overlay
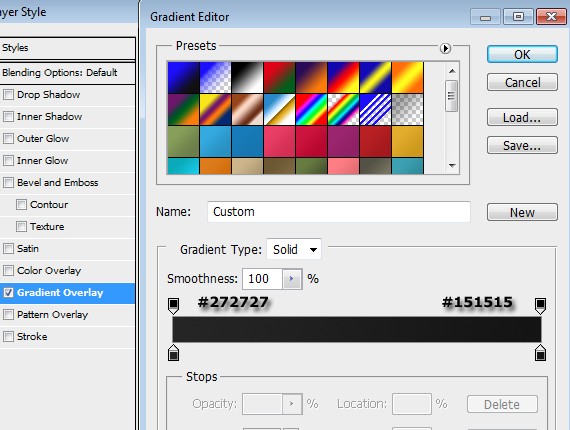
Create another line and fill it with #0b0b0b.
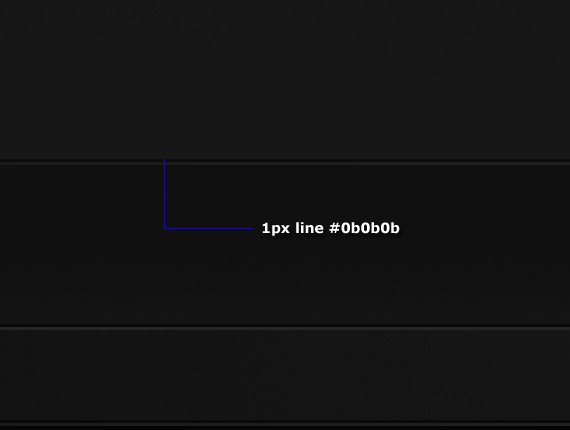
You can see now that we’ve got a nice 3D effect, ok – let’s use that ground effect and put something on it.
Create another layer at the very top of 3D folder and name it MacBook.
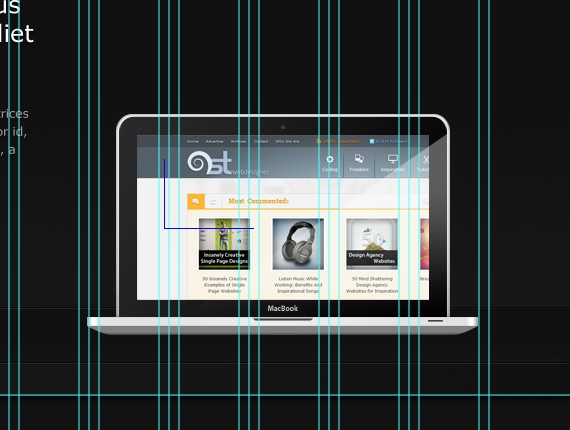
Open up the Macbook .psd file that I provided in the resources. Replace the image to some of your works and place it in our layout.
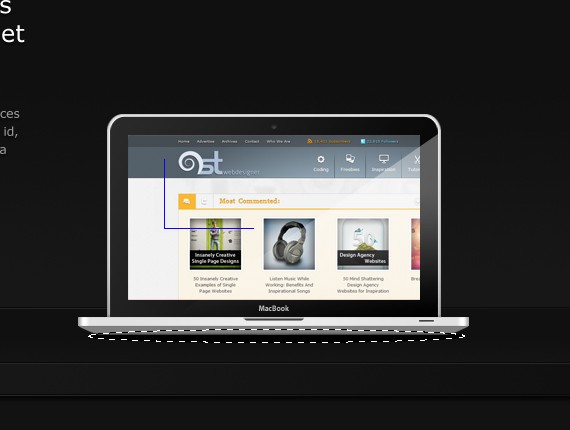
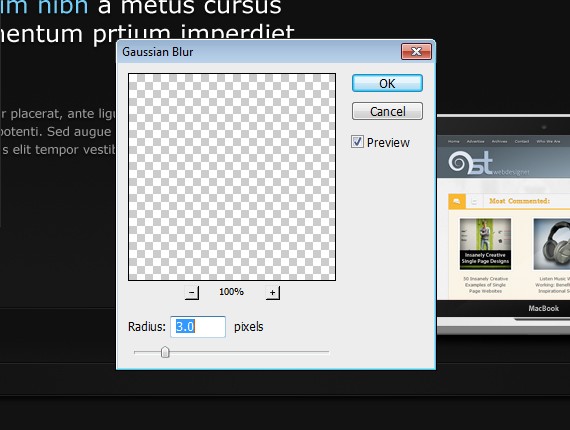
Go to Filer > Blur > Gaussian Blur;
Set the foreground color to #111111 background to #181818.
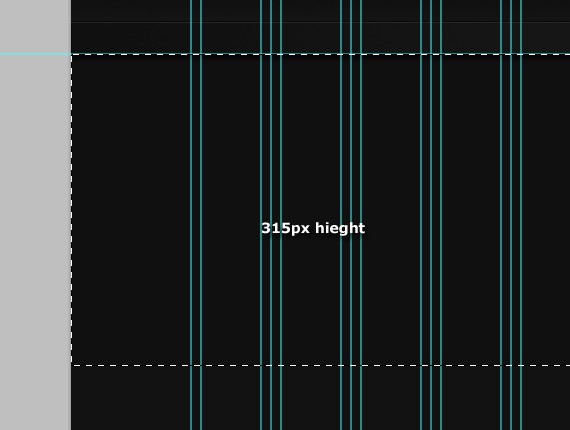
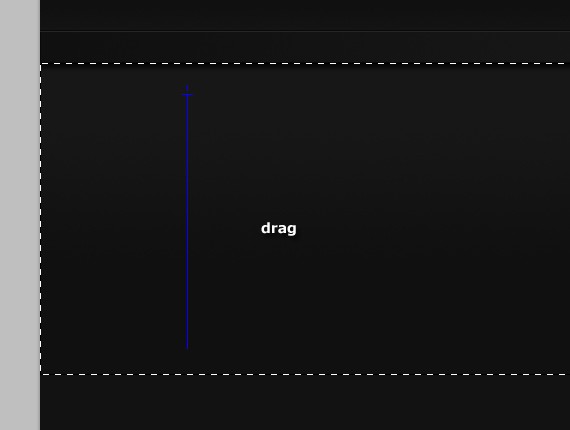
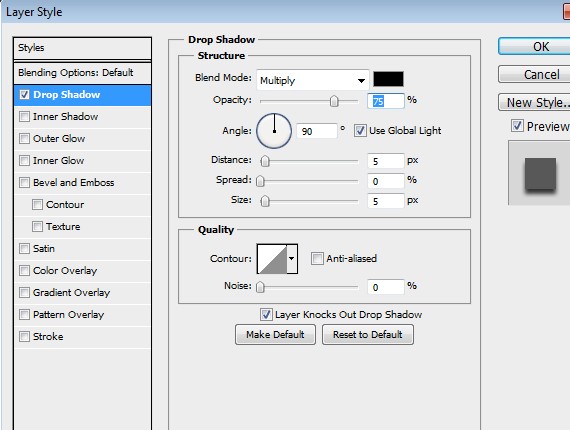
Add this Blending Option:
Drop Shadow
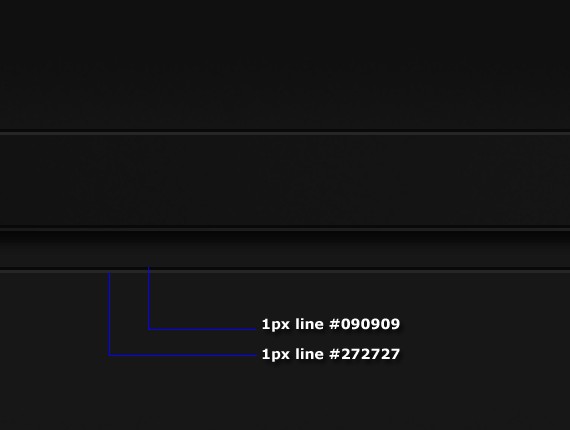
Create a 1px line as shown below.
Create a folder inside 3column_info and name it About Me.
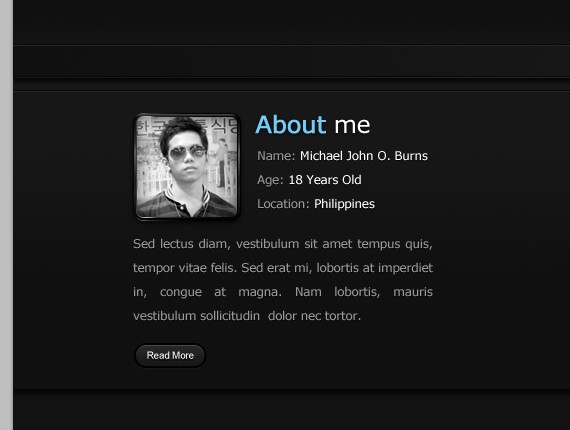
Here is what we will be making:
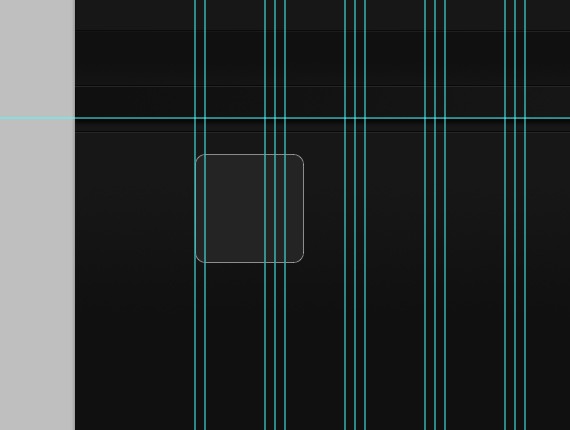
Select Rounded Rectangle Tool(U) Radius to 10px.
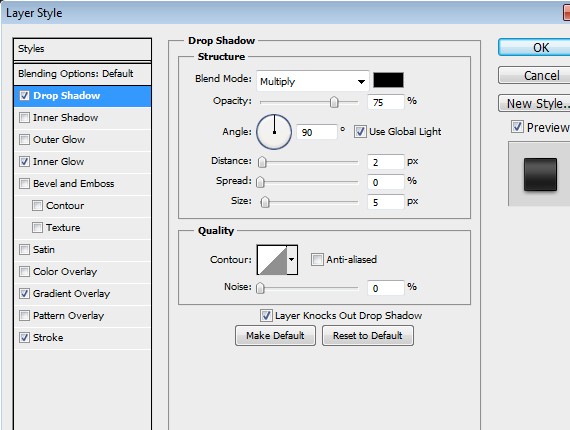
Add this Blending Option:
Drop Shadow
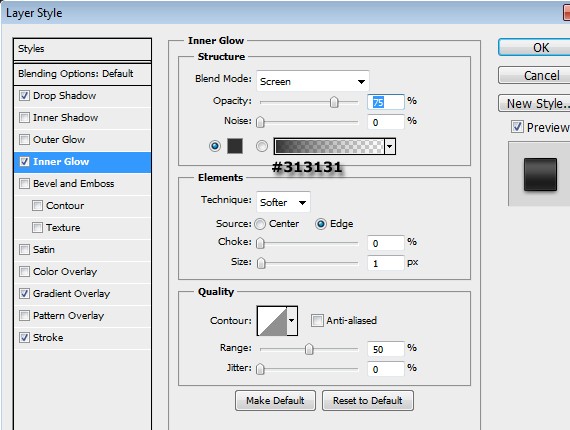
Inner Glow
Gradient Overlay
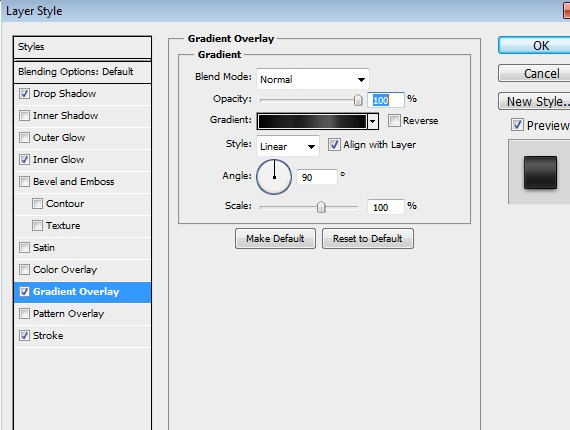
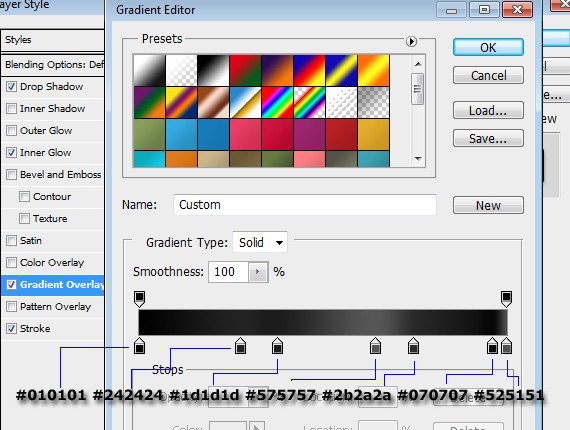
Color I used
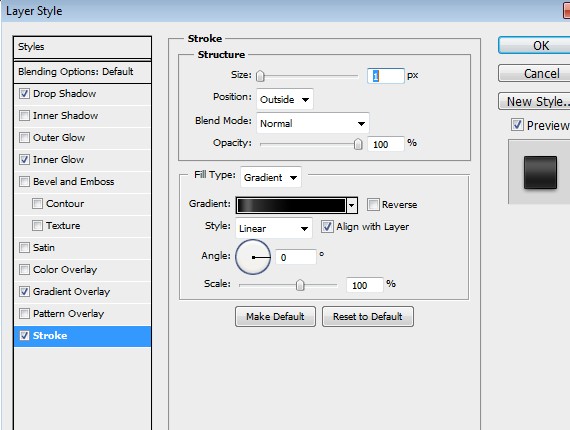
Stroke
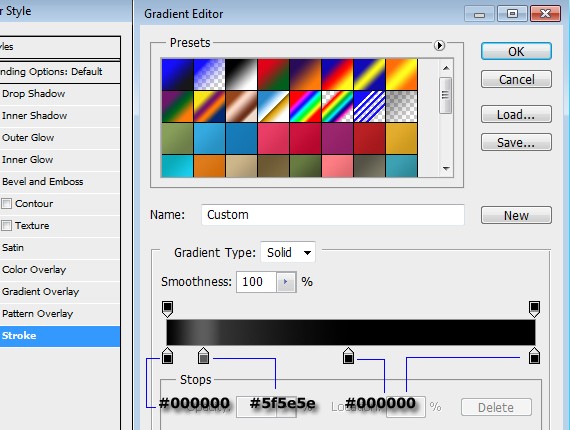
Color I used
Add this Blending Option:
Inner Shadow
Stroke
Color I used
Above the contracted layer add your image.
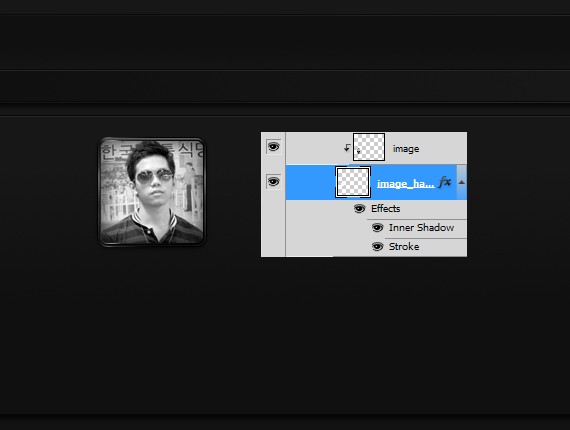
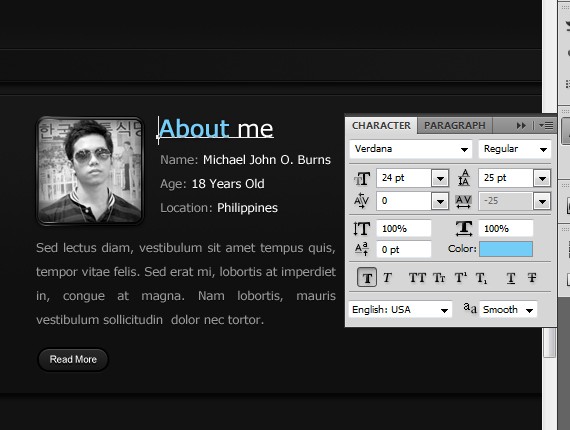
Select Text Tool(T) and follow the steps as shown in the screenshots:
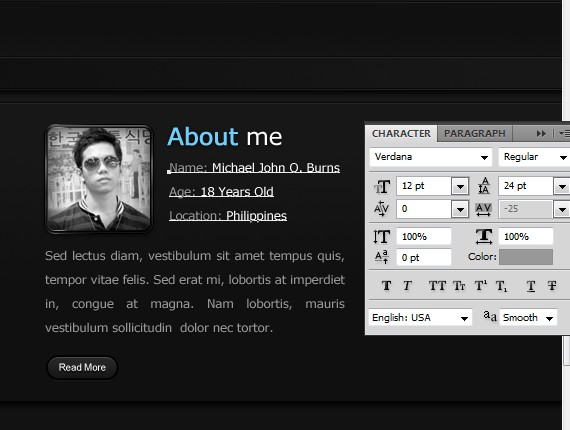
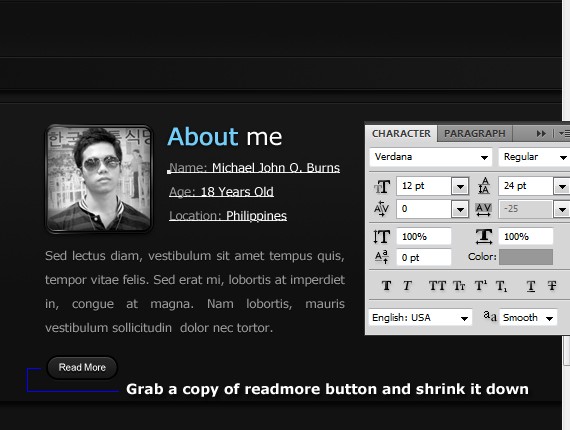
Grab a copy of read more button.
Create another folder and name it What I Do.
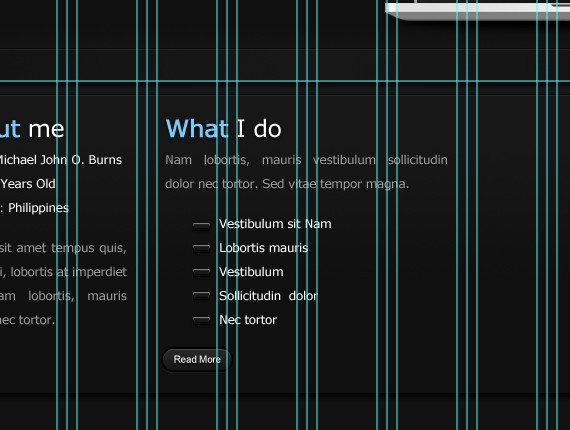
For the bullet style Select Rectangular Marquee Tool(M) and make a little Rectangle.
Add this Blending Option on it:
Drop Shadow
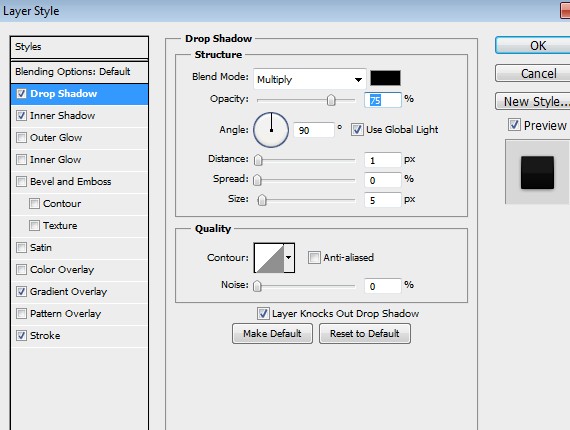
Inner Shadow
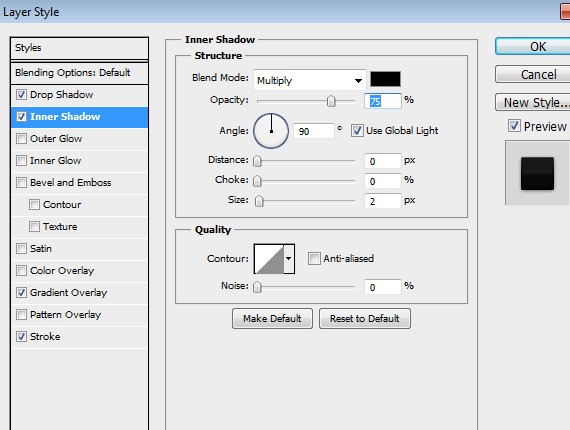
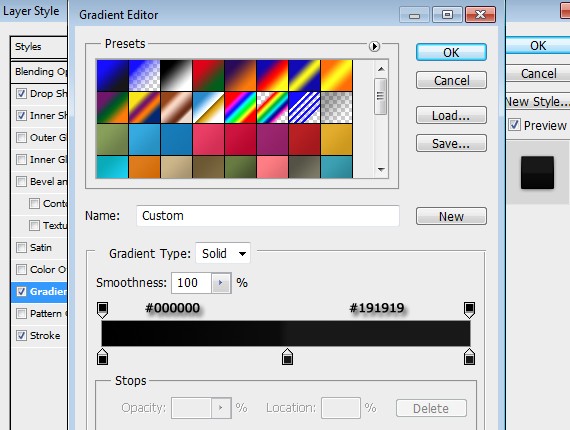
Gradient Overlay
Color I used
Stroke
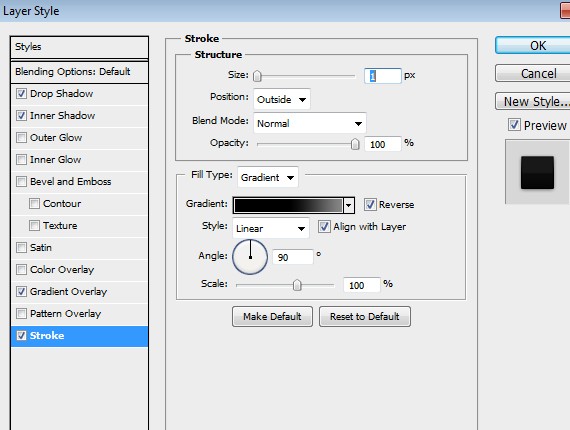
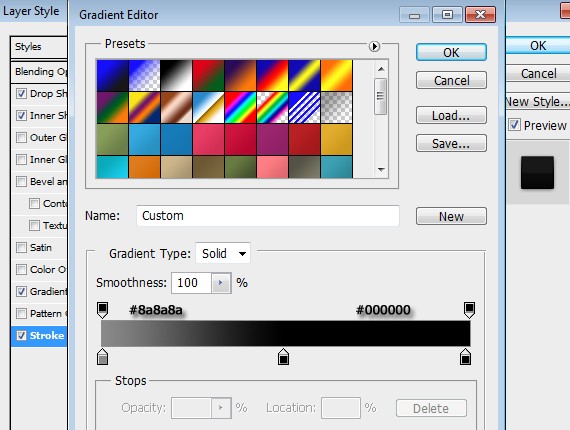
Color I used
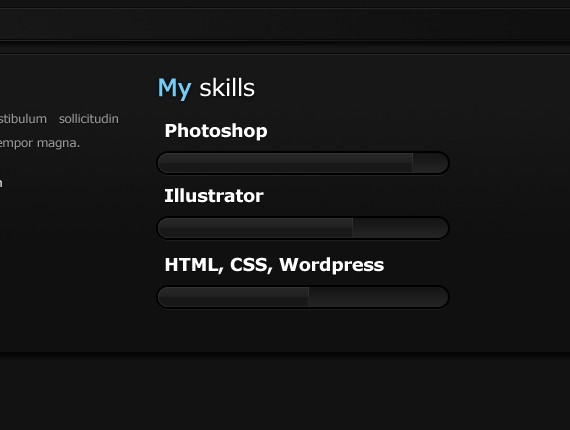
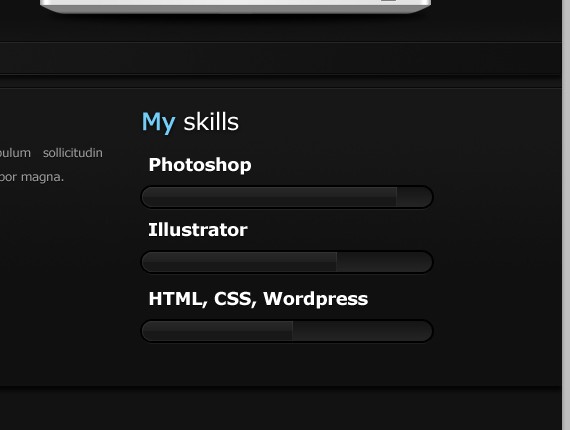
Create another folder and name it My Skills.
For the Photoshop, Illustrator, HTML/CSS WordPress text I used Verdana,bold, size to 18pt.
Select Rounded Rectangle Tool(M). Place it as shown in the screenshot below.
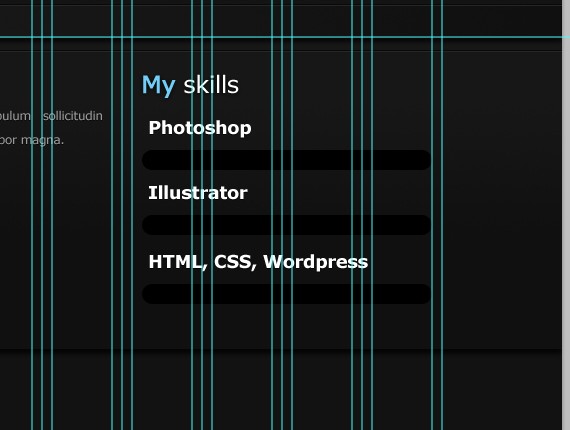
Add this Blending Option:
Drop Shadow
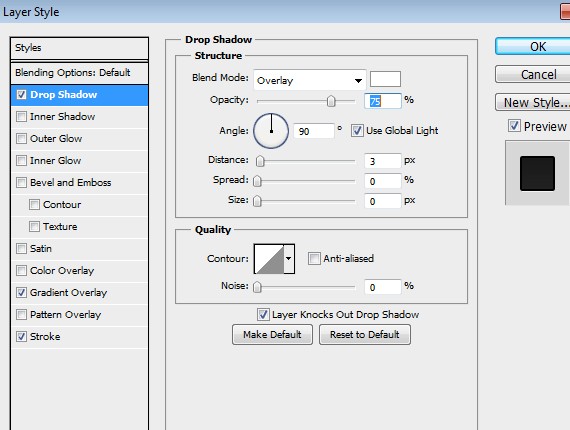
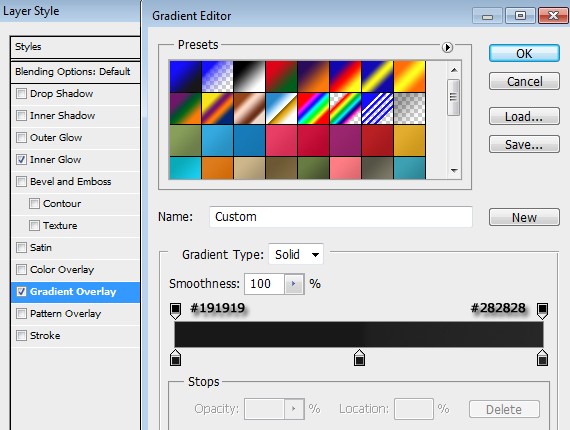
Gradient Overlay
Color I used
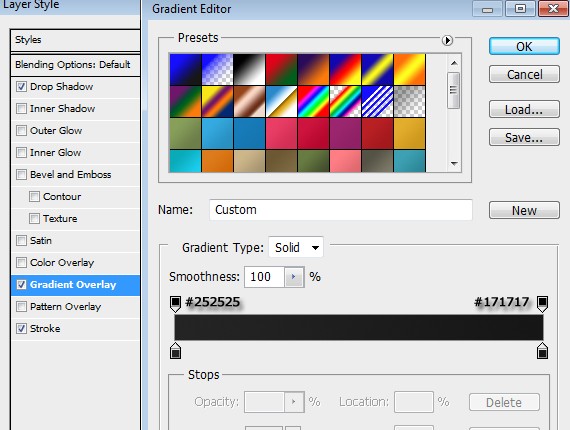
Stroke
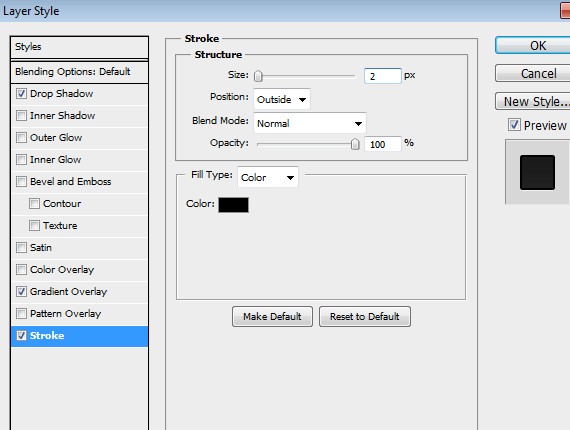
Duplicate the layer and clear the layer style by:
Inner Glow
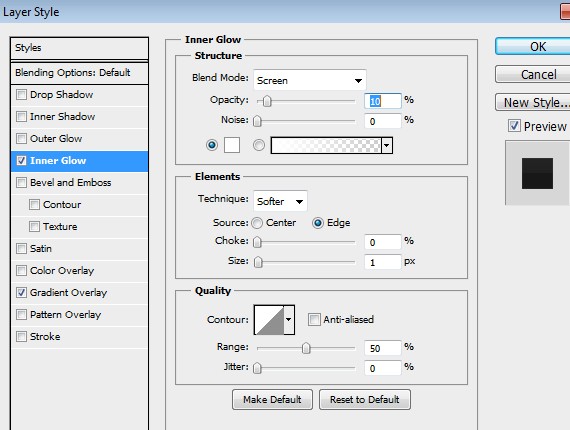
Gradient Overlay
Color I used:
Apply the same format as to our headers.
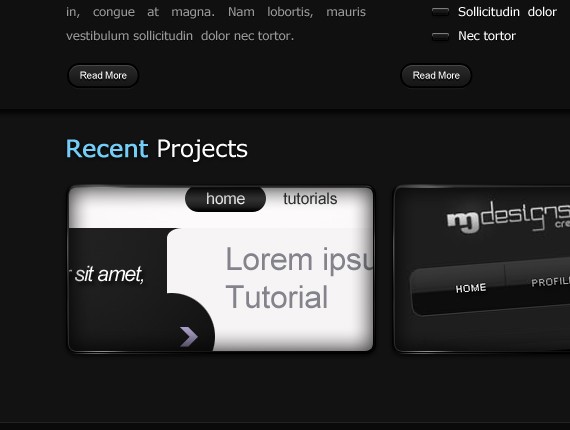
Now select Rounded Rectangle Tool(U) Radius to 10px. Create 3 shapes about 12.5 px distance from the right.
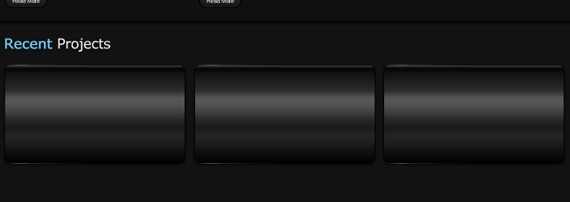
Contract it to 3px and use the same process as we did in our thumbnail in about me. Add up your image.
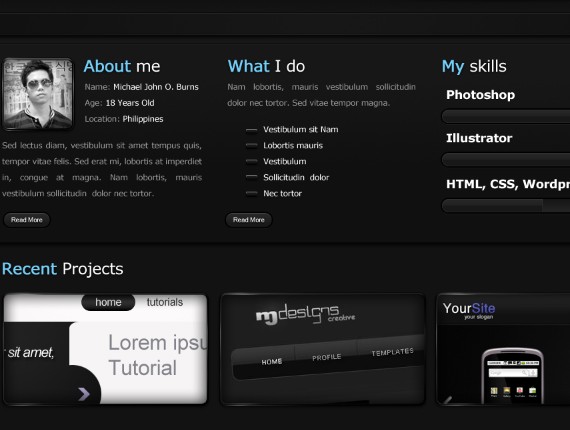
Select Rectangular Marquee Tool(M). Draw a shape at the very bottom 40px height and fill it with #0a0a0a.
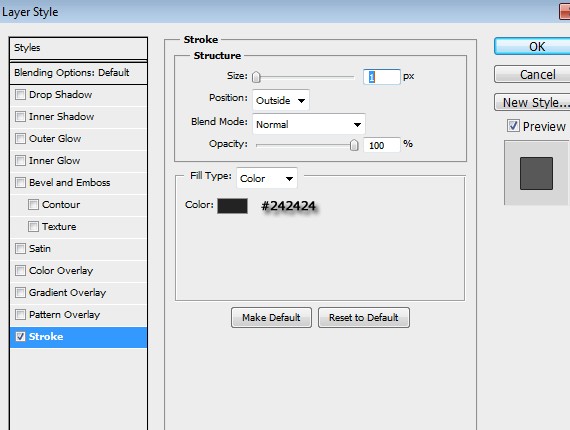
Add this Blending Option:
Stroke
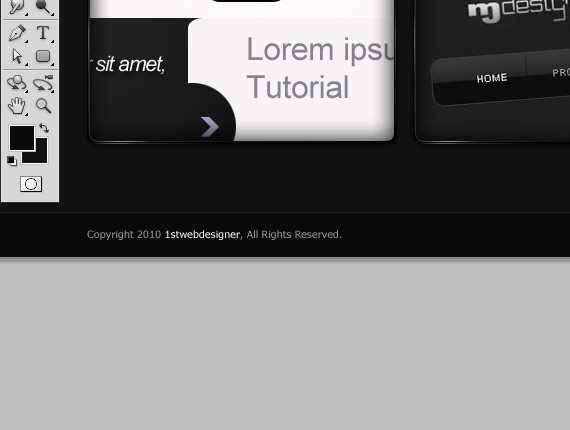
Now add up your copyright text. I used:
Finally were done! Hope you learn something on this tutorial and hope you like it. If you have any questions or tutorial request drop some comments below.
Thank you and keep coming back!


Let’s get started – I hope you will make out together with me until successful finish together !
Resources you will need to complete this tutorial:
Here is what we will making, click on image for full preview:

Before we get started download first 960grid system for easy Guideline creation.
Open 960_download\templates\photoshop\960_grid_12_col.psd
We also need to make sure that our Rulers and Guides are viewed. By pressing
- CTRL + R (View Rulers)
- CTRL + ; (View Guides)

Step1 Working with Background and Header
Rename the layer1 to Header (put everything in separate folder like Header, Navigation, Footer to help to be organized better).Fill the background color to #131313.
Create new guide. Click on View > New Guide

Select Rectangular Marquee Toll(M) and make a selection from the guide we made, fill it with #0a0a0a color.
Add this Blending Option:
Stroke
- Size: 1px
- Color: #242424

Create another folder inside the Header name it Logo, put all your logo related layers there.
Next we will create our logo. Select Rectangular Marquee Tool(M) make a selection as shown below and fill it with any color.

Add this Blending Option to it:
Drop Shadow

Inner Glow

Gradient Overlay

Stroke

Select Text Tool(T) add up your Site Name.

Add this Blending Option to it:
Drop Shadow

Gradient Overlay

Step 2: Working with Welcome Message
Create another folder outside the Header name it welcome_displays, put all you’re welcome displays related layers there.- Create new Horizontal Guide 130px.
- Select Text Tool(T) and put up your Welcome Message

Add this Blending Option:
Drop Shadow

Step 3: Working with Read More Button
Create another folder inside the welcome_displays name it read_more, put all your read more related layers there.Select Rounded Rectangle Tool(U) Radius to 15px.

Add this Blending Option:
Drop Shadow

Inner Shadow

Gradient Overlay

Stroke

Add Read More text size to 14pt, add a solid drop shadow 2px.

At the very bottom of welcome_displays layers add another layer name it background.
- Select Linear Gradient With a foreground color #111111 and background #181818.

Step 4: Working with 3D like Ground/Holder
- At the very top of our layers panel create another folder and name it 3D
- Create another layer and name it Linear
- Select Rectangular Marquee Tool(U)

Select Gradient Tool and use linear gradient. Foreground Color #111111 background #181818.

- Now create another layer at the top of linear and name it radial
- Hit X to reverse the background color and foreground color
- Make sure you choose radial gradient.
- Drag the gradient starting from the center to right.

Add this Blending Option to it:
Drop Shadow

Stroke

Now Create a 1px line color #272727

Duplicate the line and place it on the bottom:

Duplicate layer again and place it to the top.

Add this Blending Option:
Gradient Overlay


Create another line and fill it with #0b0b0b.

You can see now that we’ve got a nice 3D effect, ok – let’s use that ground effect and put something on it.
Create another layer at the very top of 3D folder and name it MacBook.
Open up the Macbook .psd file that I provided in the resources. Replace the image to some of your works and place it in our layout.

- Below the image layer create another layer and name it Shadow
- Select Elliptical Marquee Tool(M) and fill it with #000000

Go to Filer > Blur > Gaussian Blur;

Step 5: Working with 3 column Information
Create another folder below the 3D folder and name it 3column_info, put all your information related layers there.Set the foreground color to #111111 background to #181818.


Add this Blending Option:
Drop Shadow

Create a 1px line as shown below.

Create a folder inside 3column_info and name it About Me.
Here is what we will be making:

Select Rounded Rectangle Tool(U) Radius to 10px.

Add this Blending Option:
Drop Shadow

Inner Glow

Gradient Overlay

Color I used
- #010101
- #242424
- #1d1d1d
- #575757
- #2b2a2a
- #070707
- #525151

Stroke

Color I used
- #000000
- #5f5e5e
- #000000

- CTRL + Click to the layer to make a selection
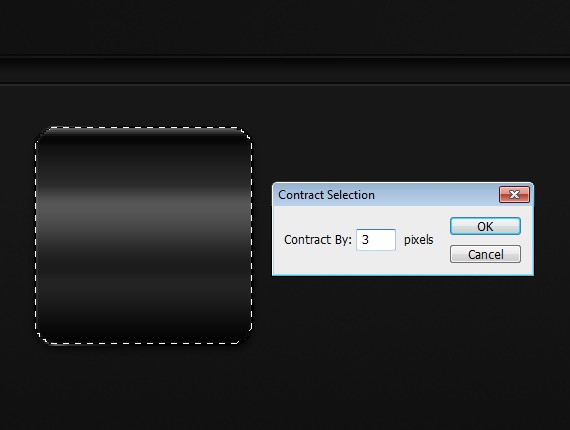
- Go to Select > Modify > Contract 3px
- Fill it with any color

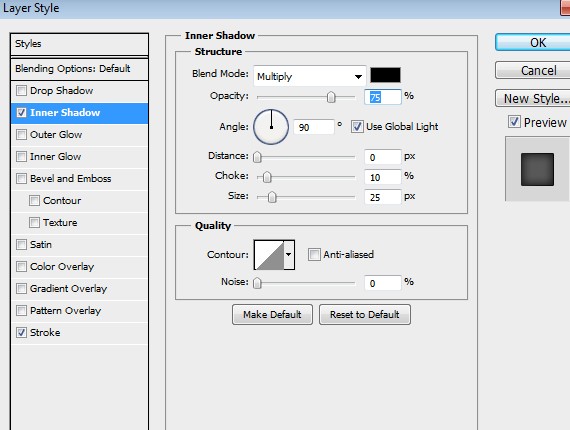
Add this Blending Option:
Inner Shadow

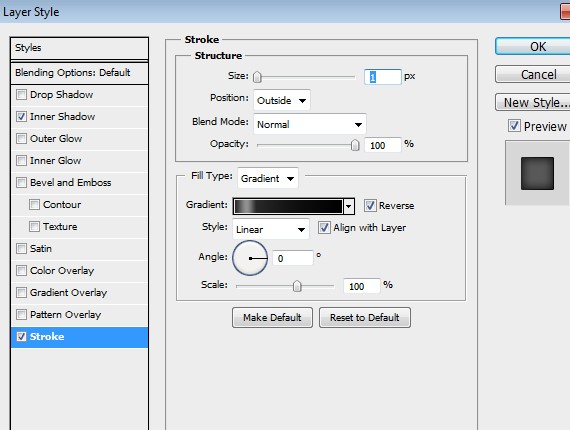
Stroke

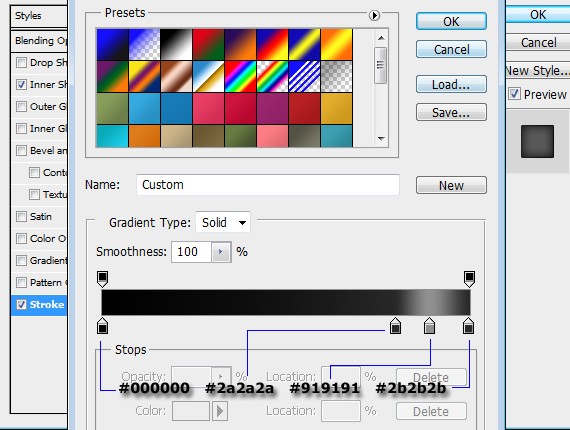
Color I used
- #000000
- #2a2a2a
- #919191
- #2b2b2b

Above the contracted layer add your image.

Select Text Tool(T) and follow the steps as shown in the screenshots:


Grab a copy of read more button.

Create another folder and name it What I Do.

For the bullet style Select Rectangular Marquee Tool(M) and make a little Rectangle.
Add this Blending Option on it:
Drop Shadow

Inner Shadow

Gradient Overlay
Color I used
- #000000
- #191919

Stroke

Color I used
- #8a8a8a
- #000000

Create another folder and name it My Skills.

For the Photoshop, Illustrator, HTML/CSS WordPress text I used Verdana,bold, size to 18pt.
Select Rounded Rectangle Tool(M). Place it as shown in the screenshot below.

Add this Blending Option:
Drop Shadow

Gradient Overlay
Color I used
- #252525
- #171717

Stroke

Duplicate the layer and clear the layer style by:
- selecting the layer
- right-click
- then select Clear Layer Style
Inner Glow

Gradient Overlay
Color I used:
- #191919
- #282828


Step 6: Working with Recent Projects
Create another folder name it recent_projects, put all your recent projects related layers there.Apply the same format as to our headers.

Now select Rounded Rectangle Tool(U) Radius to 10px. Create 3 shapes about 12.5 px distance from the right.
- Apply the same style as we did to our thumbnail image in our about me section.

Contract it to 3px and use the same process as we did in our thumbnail in about me. Add up your image.

Step 7: Working with Footer
Create another folder name it footer, put all your footer related layers there.Select Rectangular Marquee Tool(M). Draw a shape at the very bottom 40px height and fill it with #0a0a0a.
Add this Blending Option:
Stroke

Now add up your copyright text. I used:
- Verdana
- Size:10px
- Color #999999 and for the link #ffffff.

Finally were done! Hope you learn something on this tutorial and hope you like it. If you have any questions or tutorial request drop some comments below.
Thank you and keep coming back!
Final Preview

Create Amazing 3D Portfolio Dark Layout In Photoshop
![Create Amazing 3D Portfolio Dark Layout In Photoshop]() Reviewed by BloggerSri
on
10:57 PM
Rating:
Reviewed by BloggerSri
on
10:57 PM
Rating:

No comments:
Post a Comment